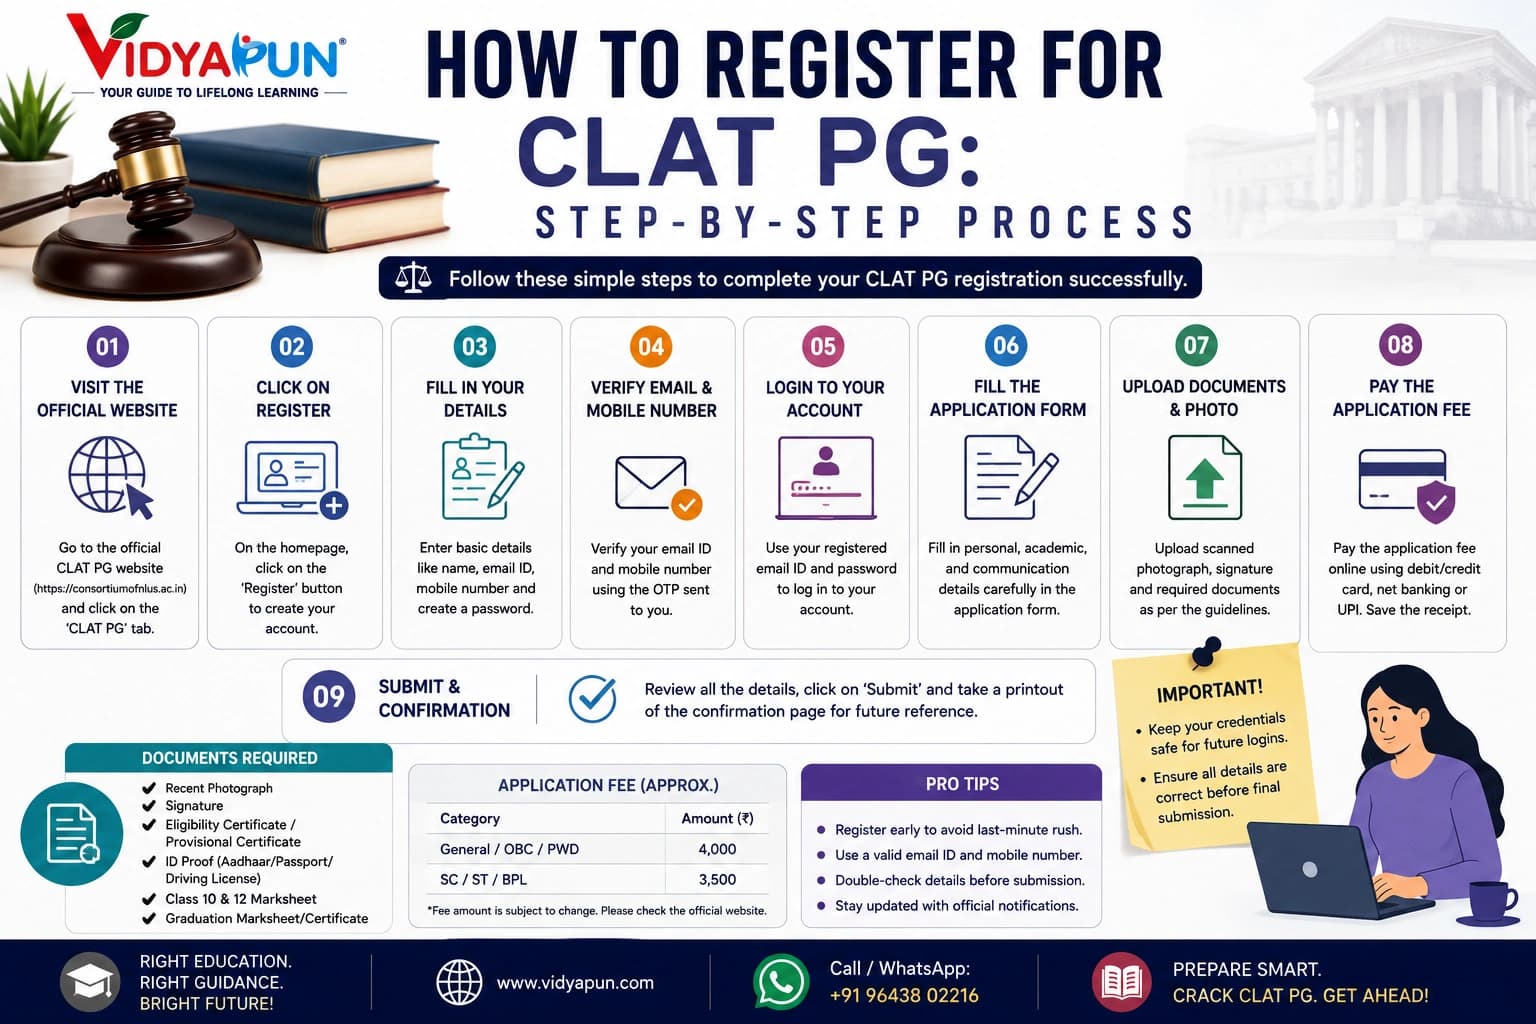
If CLAT PG is part of your Master of Laws (LLM) admission plan, registering correctly and on time matters as much as your actual preparation. This guide walks through the registration process from start to finish — what to prepare beforehand, each step of the application, and what happens once you've submitted it.
Before You Start: What You Need for CLAT PG Registration
A little preparation before you open the registration portal saves you from scrambling mid-application.
Eligibility Check Before Registering
Confirm you meet CLAT PG's eligibility requirements — a recognised LLB degree with the applicable minimum percentage — before starting registration, since you won't be able to correct an eligibility issue after the process is underway.
Documents to Keep Ready
Have a scanned passport-size photograph, signature, your LLB mark sheets and degree certificate (or provisional certificate if not yet awarded), a valid photo ID, and category certificate (if applicable) ready in the correct file formats before you begin.
Step 1 – Visit the Official CLAT Consortium Website
Always start from the official source to avoid registering through an incorrect or outdated third-party link.
Navigating to the Registration Portal
Go directly to the official CLAT Consortium website and locate the current year's CLAT PG registration link — avoid searching generically and clicking unofficial-looking links, since registration should only ever happen through the official portal.
Reading Key Notifications Before Registering
Before starting, read the official notification or information bulletin for that year's exam carefully — it contains the authoritative details on dates, fees, and eligibility that should override any older or third-party information you may have seen elsewhere.
Step 2 – Create Your CLAT PG Account
Registration starts with setting up your account on the portal.
Providing Basic Contact Information
You'll typically need to register using a valid, regularly checked email address and mobile number, since all further communication — including your admit card and results — will be sent to these contact details.
Setting Up Login Credentials Securely
Choose a secure password and store your login credentials somewhere safe, since you'll need to log back into the same account multiple times to complete, review, and later download documents related to your application.
Step 3 – Fill in Personal and Academic Details
This is where the bulk of your application data gets entered.
Entering Personal Details Accurately
Enter your name, date of birth, and other personal details exactly as they appear on your official identity documents — mismatches between your application and your ID can cause complications later in the process.
Filling In Academic Qualification Details
Provide accurate details of your LLB degree, including your university, year of completion, and marks or percentage, since this information will later need to match the documents you upload.
Step 4 – Upload Required Documents
Document upload is one of the most common places applications get delayed or rejected.
Photo and Signature Specifications
Follow the exact photo and signature specifications given in the official notification (file format, size limits, dimensions) — a photo or signature that doesn't meet the specified format is one of the most common reasons uploads fail or get flagged during verification.
Uploading Category and Other Certificates
If applying under a reserved category or seeking a fee concession, upload a valid, current category certificate in the specified format, along with any other required documents like your LLB certificate or provisional degree.
Step 5 – Pay the Application Fee
Payment finalises your registration, so it's worth getting this step right.
Accepted Payment Methods
Most portals accept payment via net banking, debit/credit card, or UPI — check the official portal for the currently accepted payment methods before you reach this step, so you're not caught without a working payment option.
Fee Waivers for Reserved Categories
Reserved-category candidates are often eligible for a reduced application fee — confirm the current fee structure and required documentation for this concession directly on the official notification before paying.
Step 6 – Review and Submit Your Application
A careful final review can save you significant hassle later.
Double-Checking Before Final Submission
Review every section of your application carefully before submitting — most portals allow limited or no corrections after final submission, so this is your last real opportunity to catch and fix errors.
Editing Details Before the Deadline
If the portal allows edits before the registration deadline, use this window to correct any mistakes you notice after your initial submission, since corrections typically become far more difficult (or impossible) once the deadline passes.
Step 7 – Download and Save Your Confirmation
Completing registration isn't quite the last step — keeping proper records is too.
Saving Your Application Number
Note down your application number and registration confirmation details immediately after submission, since you'll need them for all future correspondence, admit card download, and result checking.
Printing or Saving a PDF Copy
Save a PDF copy (and ideally a printed copy) of your completed application form for your own records, in case you need to reference your submitted details later.
Common Registration Mistakes to Avoid
A few recurring mistakes account for most registration-related problems each year.
Incorrect Document Format or Size
Uploading photos, signatures, or certificates that don't match the specified format, size, or dimensions is one of the most common reasons applications get flagged for correction or rejected outright.
Missing the Registration Deadline
Waiting until the final day to register risks running into portal traffic, payment gateway issues, or last-minute document problems with no time left to fix them — aim to complete registration well before the deadline, not on it.
What Happens After Registration
Registration is just the first step in a longer process leading up to exam day.
Admit Card Download Process
Once released, download your admit card from the same portal using your registered login credentials — check the official notification for the admit card release window and download it as soon as it's available rather than waiting.
What to Expect on Exam Day
Carry your admit card and a valid photo ID matching your application details to the exam centre, and review the exam-day instructions in the official notification in advance so there are no surprises about permitted items or reporting time.
Final Thoughts
CLAT PG registration is straightforward as long as you prepare your documents in advance, follow the official portal's specifications precisely, and avoid leaving submission until the last moment. Double-check every detail before final submission, since corrections become difficult or impossible afterward, and keep your application number and confirmation saved for the rest of the admission cycle.
Want help navigating CLAT PG registration alongside your broader LLM application strategy? Talk to Admission Expert for personalised guidance.
Frequently Asked Questions
Q1. Where do I register for CLAT PG?
A: Registration happens only through the official CLAT Consortium website — always navigate there directly rather than clicking third-party or unofficial links.
Q2. What documents do I need before starting CLAT PG registration?
A: A scanned passport-size photograph, signature, LLB mark sheets and degree certificate (or provisional certificate), a valid photo ID, and category certificate if applicable.
Q3. Can I edit my CLAT PG application after submitting it?
A: Editing is generally limited or unavailable after final submission — some portals allow corrections before the registration deadline, so review your application carefully before submitting.
Q4. What payment methods are accepted for the CLAT PG application fee?
A: Most portals accept net banking, debit/credit card, and UPI, though you should confirm the current accepted methods on the official portal before reaching the payment step.
Q5. Is there a fee concession for reserved-category candidates?
A: Yes, reserved-category candidates are typically eligible for a reduced application fee — confirm the current fee structure and required documentation in the official notification.
Q6. What should I do immediately after completing registration?
A: Save your application number, download and store a PDF copy of your completed form, and keep your login credentials safe for later steps like admit card download.
Q7. When should I register for CLAT PG to avoid last-minute issues?
A: Well before the deadline — registering early avoids portal traffic, payment gateway issues, and leaves time to fix any document or detail problems before submission closes.
Q8. How do I download my CLAT PG admit card?
A: Log back into your registered account on the official portal once admit cards are released, using the same credentials you created during registration.
🌐 Website: www.vidyapun.com 📞 Call / WhatsApp: +91 96438 02216